Using Javafx to Read in Rgb of an Image, Pixel by Pixel
This is a JavaFX Canvass Example. Through the javafx.scene.canvas package, JavaFX provides the Canvas API that offers a drawing surface to draw shapes, images, and text using drawing commands. The API too gives pixel-level access to the drawing surface where you tin write any pixels on the surface. The API consists of only two classes:
- Canvas
- GraphicsContext
A canvas is a bitmap image, which is used as a drawing surface. An example of the Canvas class represents a canvas. It inherits from the Node form. Therefore, a Canvas is a Node.
Information technology can be added to a Scene Graph, and effects and transformations tin exist applied to information technology. A Canvas has a graphics context associated with it that is used to outcome drawing commands to the Canvas. An case of the GraphicsContext grade represents a graphics context.
The following table shows an overview of the whole article:
The post-obit examples uses Java SE viii and JavaFX 2.2.
1. Creating a Canvas
1.1 The Lawmaking
FxCanvasExample1.coffee
import javafx.awarding.Application; import javafx.scene.Scene; import javafx.scene.canvas.Sheet; import javafx.scene.canvas.GraphicsContext; import javafx.scene.layout.Pane; import javafx.phase.Stage; public course FxCanvasExample1 extends Application { public static void main(String[] args) { Application.launch(args); } @Override public void start(Stage stage) { // Create the Canvass Canvas sheet = new Sail(400, 200); // Set the width of the Canvas sail.setWidth(400); // Set the top of the Canvas canvas.setHeight(200); // Get the graphics context of the canvas GraphicsContext gc = canvas.getGraphicsContext2D(); // Draw a Text gc.strokeText("Hello Canvass", 150, 100); // Create the Pane Pane root = new Pane(); // Set the Mode-properties of the Pane root.setStyle("-fx-padding: x;" + "-fx-border-style: solid within;" + "-fx-border-width: 2;" + "-fx-edge-insets: 5;" + "-fx-border-radius: 5;" + "-fx-border-color: blue;"); // Add the Canvas to the Pane root.getChildren().add together(sheet); // Create the Scene Scene scene = new Scene(root); // Add the Scene to the Stage stage.setScene(scene); // Set the Title of the Stage stage.setTitle("Cosmos of a Canvas"); // Display the Stage stage.prove(); } } The Canvas class has two constructors. The no-args constructor creates an empty canvas. After, y'all can set the size of the canvass using its width and height properties. The other constructor takes the width and height of the sheet as parameters:
// Create a Canvas of zero width and height Sheet canvas = new Canvas(); // Create a 400X200 canvas Sheet canvas = new Sail(400, 200);
1.ii The GUI
The following epitome shows the issue of the higher up case:
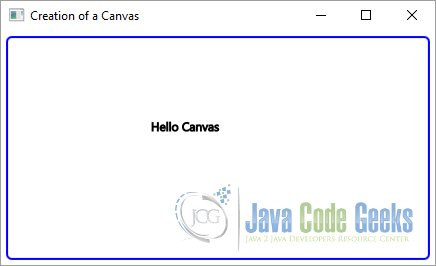
A simple JavaFX Canvas Example
2. Drawing on the Canvas
2.1 Introduction
Once you create a canvas, yous need to become its graphics context using the getGraphicsContext2D() method, as in the following snippet of code:
// Get the graphics context of the sail GraphicsContext gc = canvas.getGraphicsContext2D();
All cartoon commands are provided in the GraphicsContext course as methods. Drawings that fall exterior the bounds of the Canvas are clipped. The canvas uses a buffer. The drawing commands push necessary parameters to the buffer. It is important to notation that you should employ the graphics context from any one thread before calculation the Canvas to the Scene Graph.
Once the Canvas is added to the Scene Graph, the graphics context should be used only on the JavaFX Application Thread. The GraphicsContext class contains methods to draw the post-obit types of objects:
- Basic shapes
- Text
- Paths
- Images
- Pixels
ii.ii Drawing Basic Shapes
2.2.1 The Lawmaking
FxCanvasExample2.java
import javafx.application.Application; import javafx.scene.Scene; import javafx.scene.canvas.Canvas; import javafx.scene.canvas.GraphicsContext; import javafx.scene.layout.Pane; import javafx.scene.paint.Colour; import javafx.scene.shape.ArcType; import javafx.stage.Stage; public class FxCanvasExample2 extends Application { public static void chief(Cord[] args) { Application.launch(args); } @Override public void beginning(Stage stage) { // Create the Canvass with a width of 400 px and a height of 200 px. Canvas sail = new Canvas(400, 200); // Get the graphics context of the canvas GraphicsContext gc = canvas.getGraphicsContext2D(); // Prepare line width gc.setLineWidth(2.0); // Ready make full color gc.setFill(Color.Cherry); // Draw a rounded Rectangle gc.strokeRoundRect(10, 10, 50, 50, x, 10); // Draw a filled rounded Rectangle gc.fillRoundRect(100, 10, 50, fifty, 10, 10); // Change the fill up color gc.setFill(Colour.Bluish); // Draw an Oval gc.strokeOval(10, 70, 50, 30); // Depict a filled Oval gc.fillOval(100, 70, l, thirty); // Describe a Line gc.strokeLine(200, l, 300, 50); // Depict an Arc gc.strokeArc(320, 10, 50, 50, 40, 80, ArcType.ROUND); // Draw a filled Arc gc.fillArc(320, lxx, 50, 50, 00, 120, ArcType.Open up); // Create the Pane Pane root = new Pane(); // Prepare the Fashion-properties of the Pane root.setStyle("-fx-padding: 10;" + "-fx-edge-manner: solid inside;" + "-fx-border-width: 2;" + "-fx-border-insets: 5;" + "-fx-border-radius: v;" + "-fx-border-color: blue;"); // Add the Canvas to the Pane root.getChildren().add together(sheet); // Create the Scene Scene scene = new Scene(root); // Add together the Scene to the Stage stage.setScene(scene); // Set the Championship of the Stage stage.setTitle("Drawing Bones Shapes on a Canvass"); // Display the Stage stage.evidence(); } } The GraphicsContext class provides two types of methods to draw the basic shapes. The method fillXxx() draws a shape Xxx and fills it with the current fill pigment. The method strokeXxx() draws a shape Xxx with the current stroke. Utilise the following methods for drawing shapes:
- fillArc()
- fillOval()
- fillPolygon()
- fillRect()
- fillRoundRect()
- strokeArc()
- strokeLine()
- strokeOval()
- strokePolygon()
- strokePolyline()
- strokeRect()
- strokeRoundRect()
The post-obit snippet of code draws a rounded rectangle. The stroke color is red and the stroke width is 2px. The upper-left corner of the rectangle is at (10, 10). The rectangle is 50px wide and 50px loftier. The arcWidth and the arcHeight are 10 px.
// Create the Canvas with a width of 400 px and a height of 200 px. Sheet canvass = new Canvas(400, 200); // Get the graphics context of the canvas GraphicsContext gc = canvas.getGraphicsContext2D(); // Set line width gc.setLineWidth(2.0); // Set fill colour gc.setFill(Color.RED); // Draw a rounded Rectangle gc.strokeRoundRect(x, 10, 50, 50, x, ten);
2.ii.2 The GUI
The following image shows a canvas with a few basic shapes (rectangular, oval, etc.):
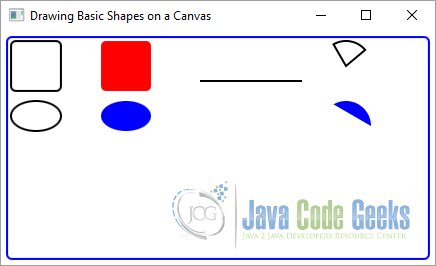
Drawing Basic Shapes on a JavaFX Canvas
2.three Drawing Text
ii.3.1 The Lawmaking
FxCanvasExample3.java
import javafx.application.Application; import javafx.scene.Scene; import javafx.scene.sail.Sail; import javafx.scene.canvas.GraphicsContext; import javafx.scene.layout.Pane; import javafx.scene.paint.Colour; import javafx.phase.Stage; public class FxCanvasExample3 extends Application { public static void main(String[] args) { Application.launch(args); } @Override public void start(Phase phase) { // Create the Canvas Canvass sheet = new Canvas(400, 200); // Get the graphics context of the canvas GraphicsContext gc = canvas.getGraphicsContext2D(); // Prepare line width gc.setLineWidth(1.0); // Set fill color gc.setFill(Color.BLUE); // Describe a Text gc.strokeText("This is a stroked Text", ten, l); gc.strokeText("This is a stroked Text with Max Width 300 px", 10, 100, 300); // Draw a filled Text gc.fillText("This is a filled Text", 10, 150); gc.fillText("This is a filled Text with Max Width 400 px", ten, 200, 400); // Create the Pane Pane root = new Pane(); // Set the Style-properties of the Pane root.setStyle("-fx-padding: 10;" + "-fx-border-style: solid inside;" + "-fx-edge-width: two;" + "-fx-edge-insets: 5;" + "-fx-border-radius: five;" + "-fx-border-color: blueish;"); // Add the Canvas to the Pane root.getChildren().add together(canvass); // Create the Scene Scene scene = new Scene(root); // Add the Scene to the Stage stage.setScene(scene); // Gear up the Title of the Stage stage.setTitle("Cartoon a Text on a Canvas"); // Display the Stage stage.prove(); } } Y'all can describe text using the fillText() and strokeText() methods of the GraphicsContext using the following snippets of code:
- void strokeText(String text, double ten, double y)
- void strokeText(String text, double x, double y, double maxWidth)
- void fillText(Cord text, double 10, double y)
- void fillText(String text, double x, double y, double maxWidth)
Both methods are overloaded. I version lets y'all specify the text and its position. The other version lets yous specify the maximum width of the text too. If the bodily text width exceeds the specified maximum width, the text is resized to fit the specified the maximum width.
The following snippet of code draws a bluish filled Text.
// Create the Canvass Canvas canvas = new Sail(400, 200); // Become the graphics context of the canvas GraphicsContext gc = canvas.getGraphicsContext2D(); // Set line width gc.setLineWidth(one.0); // Set fill up color gc.setFill(Colour.BLUE); // Draw a filled Text gc.fillText("This is a filled Text", ten, 150); 2.3.2 The GUI
The following GUI shows a few examples of stroked and filled texts:
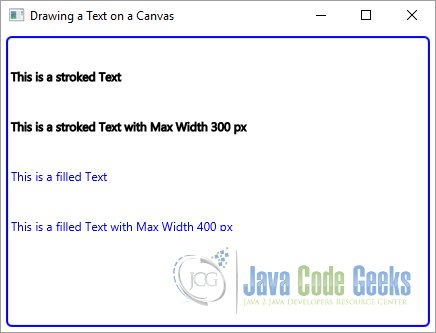
Drawing a Text on a JavaFX Canvas
2.4 Cartoon Paths
two.4.one The Lawmaking
FxCanvasExample4.coffee
import javafx.application.Application; import javafx.scene.Scene; import javafx.scene.canvas.Canvas; import javafx.scene.canvas.GraphicsContext; import javafx.scene.layout.Pane; import javafx.scene.paint.Color; import javafx.phase.Stage; public class FxCanvasExample4 extends Application { public static void main(String[] args) { Awarding.launch(args); } @Override public void start(Stage stage) { // Create the Canvas Canvas canvas = new Canvas(400, 200); // Get the graphics context of the sheet GraphicsContext gc = canvas.getGraphicsContext2D(); // Prepare line width gc.setLineWidth(2.0); // Gear up the Color gc.setStroke(Color.GREEN); // Set fill color gc.setFill(Color.LIGHTCYAN); // Start the Path gc.beginPath(); // Make different Paths gc.moveTo(l, 50); gc.quadraticCurveTo(30, 150, 300, 200); gc.fill(); // End the Path gc.closePath(); // Draw the Path gc.stroke(); // Create the Pane Pane root = new Pane(); // Prepare the Mode-backdrop of the Pane root.setStyle("-fx-padding: ten;" + "-fx-border-way: solid inside;" + "-fx-border-width: 2;" + "-fx-edge-insets: 5;" + "-fx-edge-radius: 5;" + "-fx-border-colour: blue;"); // Add together the Sheet to the Pane root.getChildren().add(canvas); // Create the Scene Scene scene = new Scene(root); // Add together the Scene to the Phase stage.setScene(scene); // Gear up the Championship of the Phase phase.setTitle("Drawing Paths on a Canvas"); // Display the Stage stage.testify(); } } Apply tin can use path commands and SVG path strings to create a Shape of your option. A path consists of multiple subpaths. The following methods are used to depict paths:
- beginPath()
- lineTo(double x1, double y1)
- moveTo(double x0, double y0)
- quadraticCurveTo(double xc, double yc, double x1, double y1)
- appendSVGPath(String svgpath)
- arc(double centerX, double centerY, double radiusX, double radiusY, double startAngle, double length)
- arcTo(double x1, double y1, double x2, double y2, double radius)
- bezierCurveTo(double xc1, double yc1, double xc2, double yc2, double x1, double y1)
- closePath()
- stroke()
- fill up()
The beginPath() and closePath() methods start and close a path, respectively. Methods such equally arcTo() and lineTo() are the path commands to draw a specific type of subpath. Practice not forget to phone call the stroke() or fill up() method at the end, which will describe an outline or fill the path.
The following snippet of code draws a quadratic curve. The color of the curve is green and the fill colour is lightcyan.
// Start the Path gc.beginPath(); // Make different Paths gc.moveTo(50, 50); gc.quadraticCurveTo(30, 150, 300, 200); gc.fill(); // Cease the Path gc.closePath();
ii.4.2 The GUI
The following image shows a simple example how to draw a path on a canvas:
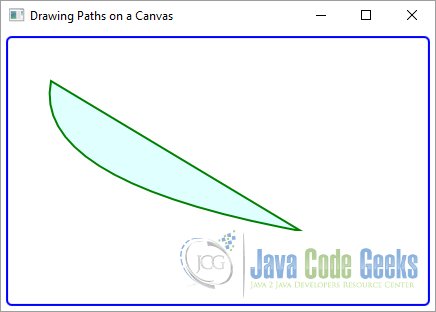
Cartoon Paths on a JavaFX Canvas
2.5 Cartoon Images
2.5.1 The Code
FxCanvasExample5.java
import javafx.awarding.Application; import javafx.scene.Scene; import javafx.scene.sail.Sheet; import javafx.scene.sail.GraphicsContext; import javafx.scene.image.Image; import javafx.scene.layout.Pane; import javafx.stage.Phase; public class FxCanvasExample5 extends Awarding { public static void principal(String[] args) { Application.launch(args); } @Override public void start(Stage stage) { // Create the Canvas Sheet canvas = new Canvas(400, 200); // Get the graphics context of the canvass GraphicsContext gc = canvas.getGraphicsContext2D(); // Load the Image String imagePath = "file:\\Path-To-Your-Prototype\\coffee-logo.gif"; Image prototype = new Epitome(imagePath); // Describe the Image gc.drawImage(paradigm, 10, 10, 200, 200); gc.drawImage(epitome, 220, 50, 100, lxx); // Create the Pane Pane root = new Pane(); // Set the Style-backdrop of the Pane root.setStyle("-fx-padding: 10;" + "-fx-edge-style: solid inside;" + "-fx-border-width: 2;" + "-fx-border-insets: 5;" + "-fx-border-radius: five;" + "-fx-border-color: blue;"); // Add the Canvas to the Pane root.getChildren().add(canvas); // Create the Scene Scene scene = new Scene(root); // Add the Scene to the Stage stage.setScene(scene); // Set the Title of the Phase stage.setTitle("Cartoon an Image on a Canvas"); // Display the Stage stage.show(); } } You tin can draw an Prototype on the Canvas using the drawImage() method. The method has three versions:
- void drawImage(Paradigm img, double x, double y)
- void drawImage(Prototype img, double x, double y, double w, double h)
- void drawImage(Prototype img, double sx, double sy, double sw, double sh, double dx, double dy, double dw, double dh)
You lot can depict the whole or part of the Image. The drawn image can exist stretched or shortened on the canvas.
The following snippet of code draws the first whole image with a size of 200 px x 200 px on the canvas at (10, 10). The second image will be drawn at (220, l). The width is 100 px and the height is 70 px.
// Create the Canvas Canvass canvas = new Canvas(400, 200); // Go the graphics context of the canvas GraphicsContext gc = canvas.getGraphicsContext2D(); // Load the Image String imagePath = "file:\\Path-To-Your-Image\\coffee-logo.gif"; Image paradigm = new Image(imagePath); // Draw the Paradigm gc.drawImage(image, 10, 10, 200, 200); gc.drawImage(epitome, 220, 50, 100, 70);
2.5.2 The GUI
The post-obit GUI shows a canvas, which contains two images:
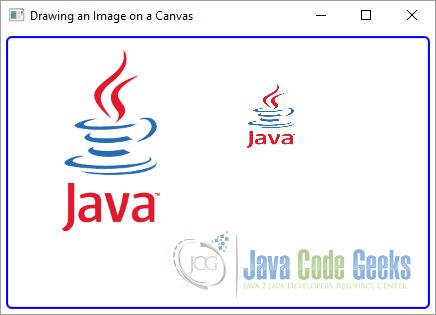
Drawing an Image on a JavaFX Sail
ii.six Writing Pixels
2.6.1 The Code
FxCanvasExample6.java
import java.nio.ByteBuffer; import javafx.application.Application; import javafx.scene.Scene; import javafx.scene.sail.Canvas; import javafx.scene.canvass.GraphicsContext; import javafx.scene.prototype.PixelFormat; import javafx.scene.image.PixelWriter; import javafx.scene.layout.Pane; import javafx.stage.Phase; public class FxCanvasExample6 extends Application { private static terminal int RECT_WIDTH = 25; private static terminal int RECT_HEIGHT = 25; public static void main(Cord[] args) { Awarding.launch(args); } @Override public void start(Stage stage) { Canvas canvas = new Canvas(400, 200); // Get the graphics context of the sail GraphicsContext gc = canvass.getGraphicsContext2D(); // Set up line width gc.setLineWidth(2.0); // Write custom pixels to create a design writePixels(gc); // Create the Pane Pane root = new Pane(); // Fix the Style-backdrop of the Pane root.setStyle("-fx-padding: 10;" + "-fx-border-mode: solid inside;" + "-fx-edge-width: 2;" + "-fx-border-insets: 5;" + "-fx-border-radius: 5;" + "-fx-border-color: blue;"); // Add the Canvas to the Pane root.getChildren().add(canvas); // Create the Scene Scene scene = new Scene(root); // Add the Scene to the Stage stage.setScene(scene); // Set the Title of the Phase stage.setTitle("Writing Pixels on a Canvas"); // Display the Phase stage.show(); } private void writePixels(GraphicsContext gc) { // Ascertain properties of the Image int spacing = 5; int imageWidth = 300; int imageHeight = 100; int rows = imageHeight/(RECT_HEIGHT + spacing); int columns = imageWidth/(RECT_WIDTH + spacing); // Get the Pixels byte[] pixels = this.getPixelsData(); // Create the PixelWriter PixelWriter pixelWriter = gc.getPixelWriter(); // Define the PixelFormat PixelFormat<ByteBuffer> pixelFormat = PixelFormat.getByteRgbInstance(); // Write the pixels to the canvas for (int y = 0; y < rows; y++) { for (int x = 0; x < columns; 10++) { int xPos = 50 + x * (RECT_WIDTH + spacing); int yPos = 50 + y * (RECT_HEIGHT + spacing); pixelWriter.setPixels(xPos, yPos, RECT_WIDTH, RECT_HEIGHT, pixelFormat, pixels, 0, RECT_WIDTH * iii); } } } private byte[] getPixelsData() { // Create the Array byte[] pixels = new byte[RECT_WIDTH * RECT_HEIGHT * iii]; // Set the ration double ratio = 1.0 * RECT_HEIGHT/RECT_WIDTH; // Generate pixel data for (int y = 0; y < RECT_HEIGHT; y++) { for (int x = 0; 10 < RECT_WIDTH; 10++) { int i = y * RECT_WIDTH * three + x * 3; if (x <= y/ratio) { pixels[i] = -1; pixels[i+1] = 1; pixels[i+2] = 0; } else { pixels[i] = 1; pixels[i+1] = 1; pixels[i+2] = 0; } } } // Render the Pixels return pixels; } } You can also directly modify pixels on the Canvass. The getPixelWriter() method of the GraphicsContext object returns a PixelWriter that can exist used to write pixels to the associated canvas:
Canvas canvass = new Canvas(200, 100); GraphicsContext gc = canvas.getGraphicsContext2D(); PixelWriter pw = gc.getPixelWriter();
Once y'all get a PixelWriter, you can write pixels to the canvas.
The post-obit method creates an array of pixels with the corresponding with, top and RGB-Code:
private byte[] getPixelsData() { // Create the Array byte[] pixels = new byte[RECT_WIDTH * RECT_HEIGHT * 3]; // Set the ration double ratio = ane.0 * RECT_HEIGHT/RECT_WIDTH; // Generate pixel data for (int y = 0; y < RECT_HEIGHT; y++) { for (int x = 0; x < RECT_WIDTH; ten++) { int i = y * RECT_WIDTH * 3 + x * 3; if (ten <= y/ratio) { pixels[i] = -1; pixels[i+i] = 1; pixels[i+two] = 0; } else { pixels[i] = one; pixels[i+one] = 1; pixels[i+two] = 0; } } } // Render the Pixels return pixels; } The following method draws the pixels on the canvas.
individual void writePixels(GraphicsContext gc) { // Define properties of the Image int spacing = five; int imageWidth = 300; int imageHeight = 100; int rows = imageHeight/(RECT_HEIGHT + spacing); int columns = imageWidth/(RECT_WIDTH + spacing); // Get the Pixels byte[] pixels = this.getPixelsData(); // Create the PixelWriter PixelWriter pixelWriter = gc.getPixelWriter(); // Ascertain the PixelFormat PixelFormat<ByteBuffer> pixelFormat = PixelFormat.getByteRgbInstance(); // Write the pixels to the canvass for (int y = 0; y < rows; y++) { for (int ten = 0; x < columns; x++) { int xPos = 50 + 10 * (RECT_WIDTH + spacing); int yPos = 50 + y * (RECT_HEIGHT + spacing); pixelWriter.setPixels(xPos, yPos, RECT_WIDTH, RECT_HEIGHT, pixelFormat, pixels, 0, RECT_WIDTH * iii); } } } 2.6.2 The GUI
The following GUI shows the effect of the written pixels on the canvass:
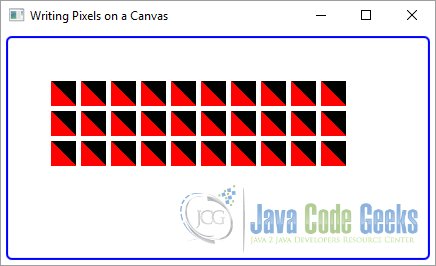
Drawing Pixels on a JavaFX Canvas
3. Clearing the Sail Area
3.1 The Lawmaking
FxCanvasExample7.coffee
import javafx.application.Awarding; import javafx.scene.Scene; import javafx.scene.canvass.Canvas; import javafx.scene.canvas.GraphicsContext; import javafx.scene.layout.Pane; import javafx.scene.paint.Color; import javafx.stage.Stage; public grade FxCanvasExample7 extends Application { public static void main(String[] args) { Awarding.launch(args); } @Override public void first(Stage stage) { // Create the Canvas Canvas canvas = new Sail(400, 200); // Get the graphics context of the canvass GraphicsContext gc = sheet.getGraphicsContext2D(); // Set line width gc.setLineWidth(ii.0); // Set fill color gc.setFill(Color.Greenish); // Draw a rounded Rectangle gc.fillRoundRect(50, 50, 300, 100, 10, 10); // Articulate the rectangular area from the canvas gc.clearRect(eighty, 80, 130, 50); // Create the Pane Pane root = new Pane(); // Set the Style-properties of the Pane root.setStyle("-fx-padding: 10;" + "-fx-edge-style: solid within;" + "-fx-edge-width: 2;" + "-fx-border-insets: 5;" + "-fx-border-radius: 5;" + "-fx-border-colour: blue;"); // Add together the Sail to the Pane root.getChildren().add(canvass); // Create the Scene Scene scene = new Scene(root); // Add the Scene to the Phase stage.setScene(scene); // Set the Title of the Stage stage.setTitle("Clearing the Expanse of a Canvas"); // Display the Stage stage.show(); } } The Canvas is a transparent area. Pixels will have colors and opacity depending on what is drawn at those pixels. Sometimes you may desire to clear the whole or part of the canvas then the pixels are transparent over again.
The clearRect() method of the GraphicsContext lets you lot clears a specified area on the Canvas:
The following code snippet clears a rectangular area within of the fatigued rectangular:
// Articulate the rectangular expanse from the canvas gc.clearRect(80, 80, 130, 50);
3.2 The GUI
The following GUI shows a simple instance how you lot can delete a given area of a canvas:
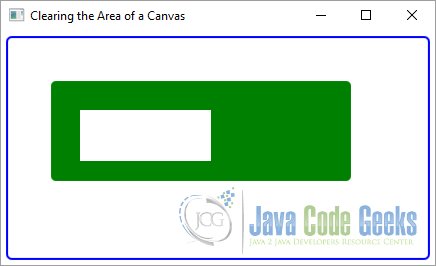
Clearing an Area on a JavaFX Sheet
4. Download Java Source Code
This was an example of javafx.scene.sail
Source: https://examples.javacodegeeks.com/desktop-java/javafx/javafx-canvas-example/
0 Response to "Using Javafx to Read in Rgb of an Image, Pixel by Pixel"
Post a Comment